Back to the Cutting Board
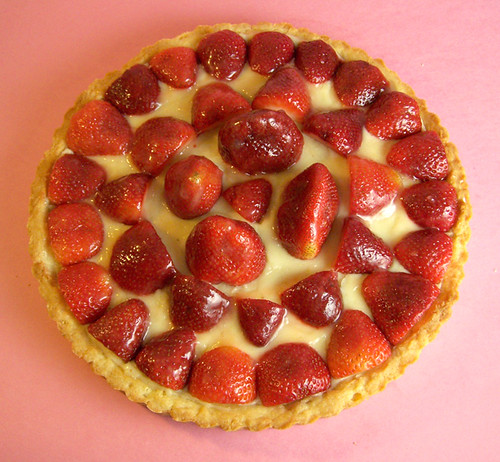
Lemon Glazed Strawberry Tart with Pastry Cream
adapted from How to Cook Everything [1] by Mark Bittman
Dessert | Servings: 8 or 9-inch tart (8 servings)
Prep time: 45 min | Cook time: 22 | Total time: 2 hour 30 min
Ingredients
- 2 – 3 cups strawberries, hulled, lightly washed and well dried
Sweet Tart Crust
This is for an 8-10 in. tart pan. Mine is 11 in., so I just doubled this recipe and froze the leftover dough.
- 1 1/4 cups flour
- 1/2 tsp. salt
- 3 tbsp. sugar
- 10 tbsp. frozen or cold unsalted butter, cut into chunks
- 1 egg yolk
- 3 tbsp. ice water
Vanilla Pastry Cream
- 2/3 cups sugar
- 2 tbsp. flour
- 2 tbsp. cornstarch
- Pinch of salt
- 2 eggs or 4 egg yolks
- 2 cups cream, half and half or whole milk
- 2 tsp. unsalted butter, softened
- 2 tsp. vanilla
Lemon Sauce (optional)
- 1/4 cup sugar
- 1 1/2 tsp. cornstarch
- 1/8 tsp. salt
- 1/2 cup water
- 1 1/2 tsp. finely grated lemon peel
- 1 tbsp. fresh lemon juice
- 1/2 tbsp. unsalted butter
Alternate glaze (optional)
- 1/2 cup strained currant, apricot or raspberry preserves
- 1 tbsp. water or liqueur
Process
Sweet Tart Crust
I had A LOT of trouble with this dough because of how buttery it is, but it tastes damn good, so it’s worth the effort. I’ll outline what worked for me when rolling this out. I’ve included the food processor directions if you have one of those. It sounds a hell of a lot simpler with a FP, but alas, I don’t have this modern marvel, so I had to do it the old fashioned way.
- Combine flour, salt and sugar in a bowl or food processor. Stir or pulse once or twice. Add in all the butter. If working by hand, use a pastry blender to cut/mix the butter until the clumps of butter are all about the same size (pea/bean sized) and the mixture looks uniform. Or in a food processor, process for about 10 seconds. Add in the egg yolk and cut in with the butter mixture for about a minute or process for a few sections.
- If using a food processor, pour mixture into a bowl. Add 3 tbsp. ice water and mix with your hands until you can form the dough into a ball. You can add a little more water if necessary or a little more flour if it’s too wet. Wrap tightly in plastic and freeze for at least 15 minutes or refrigerate for at least 30 minutes.
- Put down a large sheet (or several overlapping sheets) of wax paper or parchment. Put your silpat on top of this if you have one. I may not like silpat much for cookies, but it’s AWESOME for rolling/kneading dough on. Sprinkle with flour (yes, even on silpat). Place the dough on it, sprinkle with flour and roll out the dough. You need to get it so that it’s about 2 inches bigger around than your tart pan. But you don’t want to roll too thin or it’s just going to be impossible to get off the counter. I was very glad I doubled the recipe for the crust because it made this easier and I got a nice thick crust.
- At this point you can try to lift the dough off the counter, the best way is to drape it over your rolling pin and lay it out over your tart pan. Maybe this will work for you if you had extra cold butter and used a FP and rolled it out really fast. But for the rest of us, it’s probably going to be too soft and sticky (mine stuck to my silpat and I’ve never seen anything that sticks to that thing). If that’s the case, then get a large cookie sheet (if it has a rim, turn it over and use the back) and slide it under the wax paper to support the dough. Place this in your fridge or freezer for 10-20 minutes until the dough has hardened up again. Take it out and it will be easier to move off the wax paper/silpat (you may need to use a thin spatula to separate it). Lay it over your tart pan and press down. If the dough splits at the bend or isn’t quite high enough to go up the side of the pan, it’s simple enough to patch with extra dough from the edges. Press it into the pan well, but try not to press too hard with your fingers since the heat will just make it stickier. After the dough is pressed into the pan, take a knife and slice the jagged edges off the top. Refrigerate for about an hour.
- After the crust is properly chilled you need to prebake it. Heat oven to 425 (F). Sufficiently prick the entire bottom of the crust with a fork. Take a large piece of foil and butter one side, press the buttered side into the crust and up along the sides. Weigh the foil down with a few cups of raw rice or dried beans. Bake for 12 minutes.
- Remove from oven and reduce the temp to 350 (F). Take off the weights and the foil and put the crust back in and bake until it’s a nicely browned, 10-15 minutes. Take out and cool completely on a rack.
Pastry Cream
You can start this while the crust is baking.
- Mix together eggs/yolks and cream. In a medium saucepan, combine the sugar, flour, cornstarch and salt. Whisk the egg mixture into the saucepan over medium heat. Whisk every minute or so at first, but as it heats up and starts to boil and thicken, you will need to whisk constantly. This should take about 10 minutes.
- Turn the heat to low/medium-low so that mixture bubbles gently and cook until it coats the back of a spoon, or when you can draw your finger through it and the line stays there. Stir in the butter and vanilla.
- Strain through a fine-mesh sieve/strainer. It’s possible I cooked mine until it was too thick, but I had trouble getting it through. I wound up using different strainer (less fine) and pushing it through using pressure from the back of a large spoon.
- Set aside and let cool to room temperature. You can refrigerate it for a few hours if you make this ahead of time, but make sure to lay plastic wrap directly on top of the cream or else a skin will form on it.
Finally, Make the Tart (This is the easy part!)
- Spread the cooled pastry cream inside the cooled tart crust. You may not need all of it if you have a smaller tart pan, but it was the perfect amount for my 11 in. pan. Arrange the strawberries on top of the cream in whatever configuration you like, just try to get as many on there as you can.
- It’s ready to serve now or you can add a glaze if you’d like. (I liked it after it had been chilled in the fridge for a few hours, but that also resulted in my glaze getting kind of gunky, so if you chill it first, you may want to wait and put the glaze on right before serving. )
Glazing (Optional)
I’m including the lemon sauce I made as well the glaze suggested in the cookbook. You can use either one or choose not to glaze at all.
Lemon Sauce
- Combine sugar, cornstarch and salt in a small bowl. In a saucepan, boil 1 cup of water. Add the sugar mixture to the water.
- Cook, stirring constantly, until mixture is thick and clear.
- Stir in lemon peel, lemon juice and butter.
- Brush the tops of the strawberries with the sauce.
Alternate glaze
- In a saucepan, warm the strained preserves with the water or liqueur over medium-low heat until thinned.
- Brush the tops of the strawberries with the glaze.